 Contents |
What's New |
Image Index |
Copyright |
Puzzles |
Story Hobby/ |
Posters |
Search |
| ||||||||||||||||||

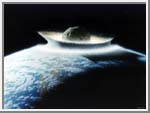
Courtesy of the Jet Propulsion Laboratory
Cratering in your ClassroomImpact cratering is a process found everywhere in the solar system except on the giant gaseous planets. Earth has been heavily impacted but erosion has removed most of the craters. Perhaps the finest surviving impact crater on Earth is the Barringer Meteor Crater near Winslow, Arizona. It is 1.2 kilometers (0.75 miles) across and 200 meters (650 feet) deep. It was formed about 49,000 years ago when a 50 meter (150 foot) nickel/iron meteorite struck the desert at a speed of 11 kilometers per second (25,000 miles per hour). An examination of actual craters, almost any image of the Moon will do, will prepare the students for this activity. Just about all craters have deep central depressions, raised rims, and a blanket of ejected material surrounding them. You and your students can observe the Moon directly during daylight. Check your newspaper for the phases of the Moon and observe it in the afternoon during "first quarter" and in the morning during "third quarter." The Moon will be separated from the Sun by 90 degrees to the east (left) at first quarter and 90 degrees to the west (right) during third quarter. The large dark regions are the remains of very great impacts and many retain their circular boundaries. Binoculars on a tripod provide a spectacular view. You can create craters in the classroom with a box, lined with a trash bag, with sides at least 4 inches high (the lid to photocopier paper boxes is perfect); flour (3 to 4 inches deep with at least an inch of clearance to the box rim), some dry (powdered) tempra paint (red or blue), and some marbles. Place the flour in the box and smooth and firmly pack it (experiment with different firmnesses). Place a dusting of the paint powder over the flour (colored water in a spray bottle works, but not as well). Use the marbles to bombard the surface (one at a time). Look for classical cratering features: basin, raised rim, ejecta blanket (material excavated from the crater and dumped around it, visible as white flour on the colored powder), and rays (material shot out at high velocity forming lines pointing directly away from the impact site). Students should keep careful records and can do top and profile drawings of the craters and compare craters formed by different size projectiles, different velocities, and different angles of impact. Different size projectiles can be dropped from measured heights so that they will have common velocities. They should also remember that the quality of their tests is more important than quantity. After several craters, the flour and tempra can be mixed and re-smoothed without changing the white of the flour too much. Then a new layer of tempra can be applied and additional experiments conducted. In real impacts the impacting object is destroyed or broken up into small chunks. Of course the marble will not do this and will remain whole in the crater. Vocabulary
|
